Pages

Monday 11 March 2013

DIY Flower Crown

Summer is fast approaching (despite the snow) and one of the hottest trends for the past few years are flower crowns. Usually worn in the festival scene but not limited to. Here is a quick an easy way to make a flower crown this Summer!


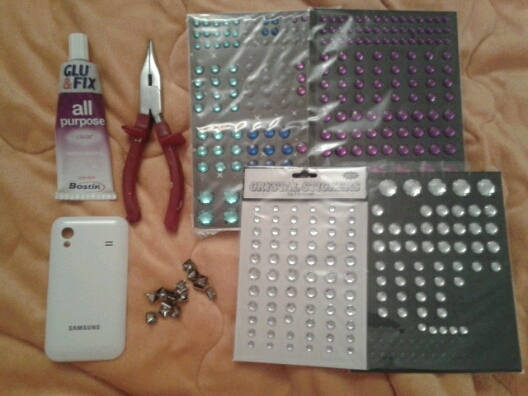
You will need: False flowers (dealz €1.50, Henry Street), A head band (The one I used us a flat clear one I got in Beads and Bling for €1.75. You can get cheaper ones just make sure they are not thin and rounded as this will make it difficult to stick your flowers on.), Glue, Scissors and then Rhinestones, Sequins, Beads etc to decorate.


Next you will need to remove the plastic parts of your flowers. This makes them easier to stick.


Then you will have seperated layers of petals like so.


Layer them on top of each other and pierce them with a flat backed stud like so.


If you dont have studs like this you can use toothed studs like these or glue the petals together seperatly and fix with a gem, sequin, button or anything you like. Just use plenty of glue.


Glue your first flower to the band buy the back of the flat stud and some surrounding fabric. Balance it against something and allow to dry before proceeding to the next flower.


Repeat until all flowers are glued.


Now you have a natural looking flower crown. You can stop here if you choose.


I however am a glits monster and have to make everything shiny. I merely glued rhinestones onto the petals of the flowers, again one flower at a time and leaving it to dry.


                      <<<< The Left side.


                       The Right side >>>>


Hope you all enjoyed this tutorial!
any queries just post below.


Ais
XOXOXO

Wednesday 19 December 2012

I'm not dead


Just had a brief encounter in the hospital. Nothing major. Hence no tutorials!


 That's supposed to do that right? ... Nurse!?


But on the plus side, sick people get teddy bears!

So I'll be back this week with more tuts! 
Ais.
<3

Tuesday 4 December 2012

My first successful bake!

I try to bake. A lot. But I never get a good result. Cupcakes that taste like fish bread (yeh that happenned) and I burn EVERYTHING! 
Today I successfully baked ALL BY MYSELF and they turned out edible!
The trick is to watch them and check on them regularly and not ignore them and go watch Come dine with me. who knew?


Happy Birthday Ciara!

Ais
xOxO


Sunday 2 December 2012

who says redheads can't wear red

So the other night I wore a red dress and people kept commenting "Oh you look really nice! Usually Red heads cant wear red!"


This is me in my red dress and red hair!
So I compiled a gallery of other red heads in red.
Enjoy!


Saturday 1 December 2012

Custom Phone Case


You will need: a phone case, all purpose glue, pliars, studs, rhinestones and anything else you want to decorate the case with (make sure it is flat backed)


I had to use a liars to turn in the spokes on my studs as they are designed to pierce into clothes.


So they are folded into themselves like so.


Then just start gluing on your studs and gems. These studs are from Euro2 which are all over the country and they come with glue on the backs. Packets are €1.
The studs are studs taken out of an old belt.


 And voila!

Hope you find this tutorial helpful!
Check out my facebook page: https://www.facebook.com/pages/Bonersaurus-Rex/442374129142148?fref=ts 

Ais
XoXo


Friday 30 November 2012

My own thumbnail!


I have my own Thumbnail!

For my weekly style feature on College Times.

Check out http://collegetimes.ie/style/

Tuesday 27 November 2012

DIY Earmuffs from a slipper!


You will need: An old slipper (clean), A hair band, fluff, scissors, glue and decoration if you like.


Cut your fabroc so that it is flat (ie not a slipper). Draw 4 circles on your fabric. I used a Nutella lid... mmm.
Also cut off the fur trin from the top of your boot.


Here is what you should have.


Glue 3/4 of your circles edge and place 2 circles together. Repeat with the last 2 circle.


You should have 2 circles like this, like pouches.


Stuff your pouches with fluff. (I got my fluff from an old teddy bear. R.I.P. Hansel) 


Cover the end of your hair band in glue and insert into the pouch. Glue up the open part.


Here I glued the fur from the rim of my boot to the band.
Let stand to dry. Before completely dry put on your muffs and make sure they cover your ears. Don't do this until muffs are semi dry or you'll get glue in your hair.


Decorate how you wish, I decorated mine with these bows from Mei Flower.


 Leave to dry and wear!


Look at me! I'm feckin delighted with my new muffs!
(So much innuendo in this piece)


Hope you enjoyed this tutorial!
Check me out on Facebook: https://www.facebook.com/pages/Bonersaurus-Rex/442374129142148?ref=hl 

Ais
XOXO